Back to Maintenance Manager for Education Main Menu
Adding and Managing Users
The Manage users feature allows Administrators to add and manage users, assign roles, and set a user's hourly rate. Administrators can also deactivate users, and edit user details such as name, role, and hourly rate.
Adding a New User
To add a new user:
-
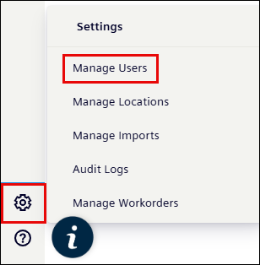
Navigate to the Settings
 icon.
icon. -
Click Manage Users.
-
Click +New User button at upper right corner of the page.

-
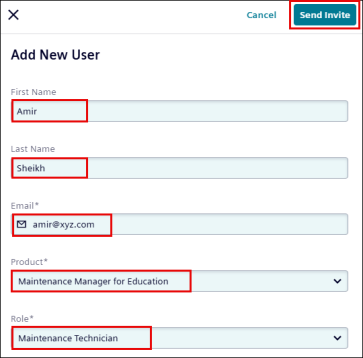
Enter required details:
-
First Name
-
Last Name
-
Email Address
-
Select a Product from the drop-down list
-
Select a Role from the drop-down list
-
-
Assign a role from the Role drop-down list.
-
Click Send Invite button.
This sends the user to email invitation to set a password and login to the account.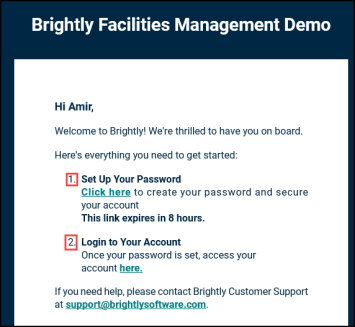
NOTE
*The user must set-up the password within 8 hours before the link expires.
* See How to Log in to know how to set-up a password.
Managing Users
1. Searching for Users
-
Use the search bar at upper left of the page.
-
Enter a user’s name.

2. Updating User Details
-
Click the user’s row in the users list.

-
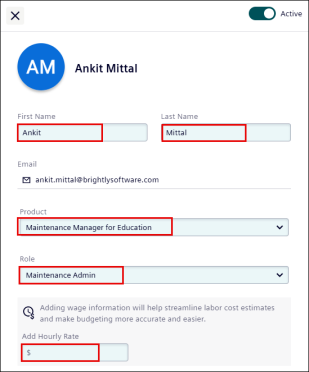
Update the details as required:
-
First Name
-
Last Name
-
Add Hourly Rate
-
Product
-
Role
NOTE Email address can’t be updated.
-
-
Deactivating and Activating Users
-
Click the user’s row in the users list.

-
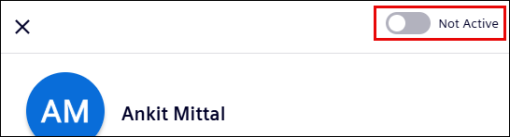
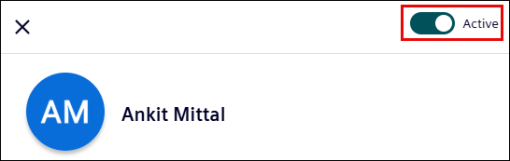
Turn off the Active toggle switch at the upper-right corner of the page to deactivate the user.
NOTE Once deactivated, the user cannot login and will no longer appear in Assign to list if they are Admin and Technician.
-
Turn on the Not active toggle switch to activate the user.